Sunday, November 14, 2010

Tools on wood


All you need is a chunk of wood, an idea, some files, carving chisels, sand paper and a good eye.

The devil is in the details


To emphasize the curved tip toe foot and define its shape within the block of wood that is the foot part, I am going to add shaping and relief cuts. I need a detail to blend the legs coming down and transition into the foot so I cut a rounded step into the side of the foot. This curved groove is a risky slice at this point, I'll carefully use a router template to add my detail before I sand and fare it in. The fade down on the side lets me add a curve of the toe.

Saturday, November 13, 2010

Take a break


Time for a little hike to stretch the legs and open the mind.

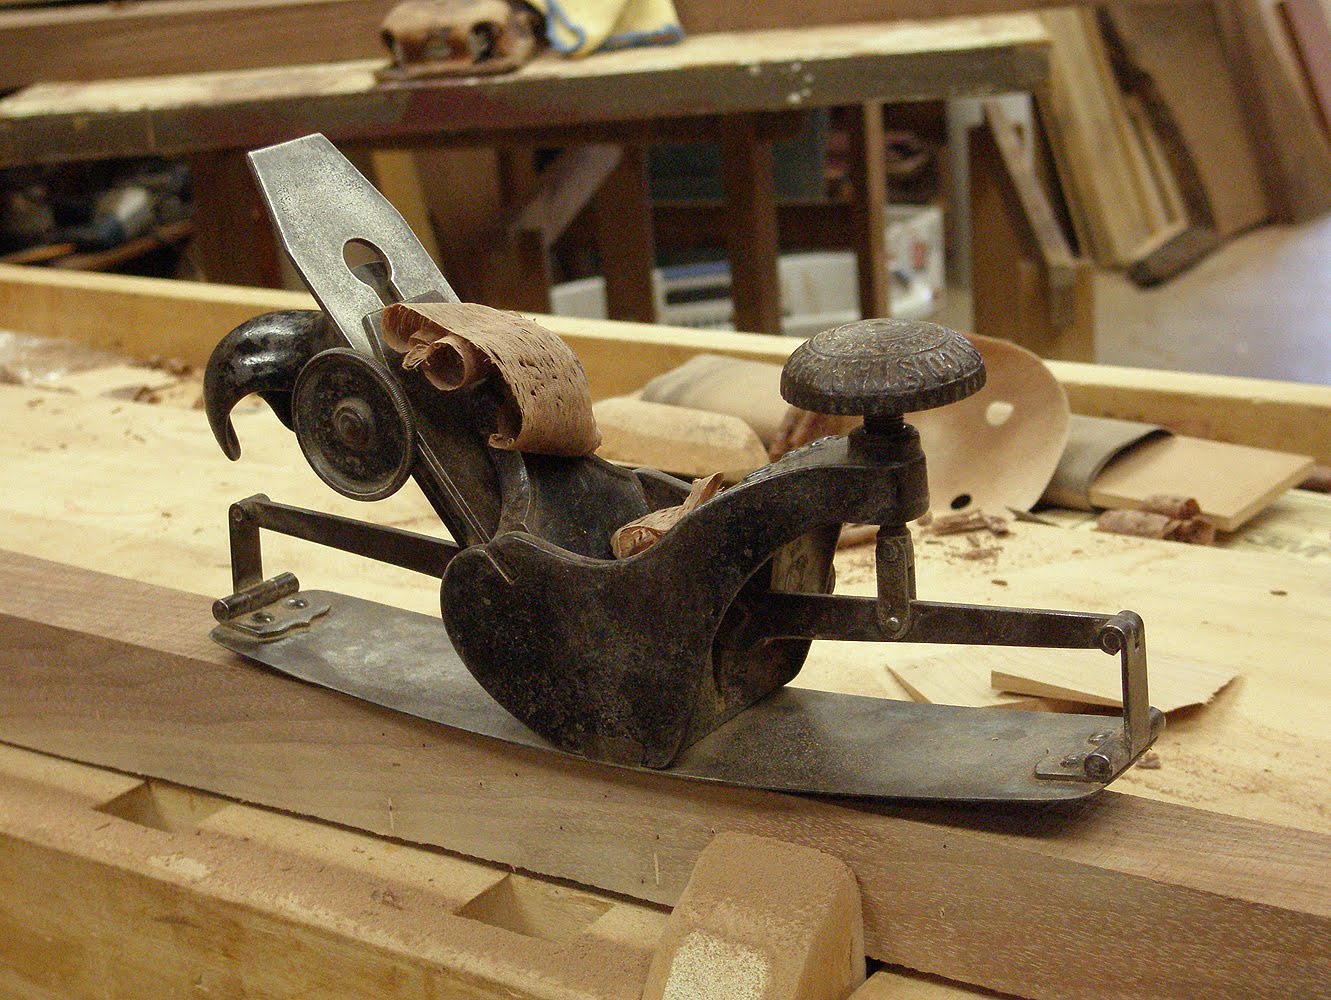
Compass plane


I sharpened this beauty the other day- it has a bending sole so I can adjust the curvature to match the shape of the wood. This plane is really nice and has an inscription on the side: pat'd June17, 1879 Thats my birthday Mo and D not year of course, but this makes it my lucky plane and it really is a reall workhorse and thing of beauty. I bought it at a flea market in Norton MA, 1985.

Shapes


I get to use my newly sharpened chisels to clean up the shapes of the under sdie of the foot- the round detail is really only noticed at the edge but I'll clean up the whole under side. This is a prefect spot for my compass plane, it makes the curves fare but wont quite reach into the corners without being turned a little so I dont damage the curve.

Mortises


I've mortised the joints into the legs and foot parts, there are alignments for pieces that will guide the drawers and slots for side panels, stretchers to attach the top and keep it flat and connector parts to assemble the base. I'll often put pieces together dry fit so I can measure off them and cut related parts to size. I cut some shapes on the band saw, relief carvings to follow.

Thursday, November 11, 2010

Jump around to stay steady

I try to stay ahead of myself so I'll glue the top up and then work on the joints, when I glue some parts I have a top thats ready to sand. Here I'm scraping off the glue while its wet, thats easier and safer that when its hard and full of chips that can damage planes and machines.

Stickers


I always sticker my wood so there is equal air exposure- this keeps it balanced and flat.

Garry's box


My pal Garry made my water stone box, 15 years ago, still hanging in there- its made of white oak and holds water like a boat keeps it out. I have three phases of sharpening, coarse medium fine. All my stones are natural sediment stones.

Sharpening


Gotta keep them tools nice and sharp! I have a water grinder that makes a nice concave grind on top of the chisel and blade edge, then I'll lap it on several stones until nice and sharp! I have a few planes that I like, the #4 stanley is my most used, I also use chisels for shaping.

Parts and joints


I've got most of the parts for the table base ready for cutting and laying out the joinery. I have to anticipate the strength of the wood receiving the joints, walnut is a fairly strong wood but I need as much wood left around the joints for strength and still get the proportions I want. My design has a fairly lean detailing for the legs and stretchers, yet the foot cross piece will have some shaping and mass reduction later. These parts have shaping and curves that I'll cut after I get the joints cut and fit tight.

Milling


Since I like wide boards for their matching grain, I'll mill the parts as wide as possible- here I'm using my 8 inch joiner to mill a 12" wide board- of course the rabbit edge of the joiner will leave a rough strip- I'll deal with that using a step plate in the planer- this allows the rough strip to ride off the table and gets me a smooth top I can flip and mill the entire width of the board.

Parts


I'll cut the parts out of the rough lumber on the bandsaw- this allows for some of the internal stress to come out prior to milling, this stuff is plenty dry and stable, also the grain is mostly rift sawn so its naturally stable.

Rough lumber


After I have a general idea of the design, its time to see if the wood will work and I'll make dimensional adjustments as needed- I'll lay out the parts and rough cut the pieces with a skill saw out side.

Hall table in walnut


New design!- I have a piece in mind that is based on a federal style hall table, a long narrow table with a pedestal style base, and I wantto add a few drawers. I'm using some walnut that was cut in the 70's- very nice wood aged 40 years! I've owned it and carried it around for more than 15 years- time to use it!

Saturday, January 16, 2010

Final look


We busted out a snappy job!

Well here it is! We have flipped the table over and landed it on the floor in the middle of the shop. I like the top edge detail and adding it to the outer edge of the legs adds a subtle quality. To me the table has balance, a nice flow, and it seems pretty sturdy. Its off to the finisher for the final quality touch.

Skirt and top attachment


Here we are attaching the top to the base and adding some slotted cross pieces to keep the top flat and allow seasonal movement.

We added a decorative skirt under the table edges to increase the visual thickness of the table top. Here I'm laying out the pieces to be used and Than is routing the set back. This is ultra-risky work at this point of the making process. We are risking damage to the top we have worked so hard on to this point there is no room for mistakes. Success! Good lad.

Curved foot detail


I really like the sculptures that are created by the clamps, the wood pieces and the other parts of the design. I could see making an entire piece of furniture leaving clamps and rough shapes in the final execution.

The table received a foot detail that followed the curve of the legs, this shape was massaged into final form by Divya of Divya Design Studios, the designer for this project. Here I attached the blocks to the base, with final spoke shave and sanding, we can enjoy a flowing leg design.

Prep for glue


Gluing big parts is a nerve racking thing to do- I have many joints that need to be tight and align perfectly, I cant afford to make a mistake. That in mind, I've made some custom blocks to assist in gluing the legs to the base, after I prep the foot cross, I'll glue the legs down to the cross and them take the top cross down onto the leg tops to complete the base parts glue-up.

Thursday, December 31, 2009

Base coming together


Well we can finally see the base parts as a whole unit now, dry fit and awaiting the other cross parts.