Thursday, December 31, 2009

Base coming together


Well we can finally see the base parts as a whole unit now, dry fit and awaiting the other cross parts.

Small details


We added a detail to the top edge that will make the line crisp and feel ok on the elbows.

Shop philosophy


One of my favorite times in et shop is when the bench work piles up and we get to chat and work, tools on wood, good BS.

Hand work begins in earnest


Sharp hand tools and sand paper smooth shapes on the bench.

Sunday, December 27, 2009

Band saw fun


Now all I have to do is cut out the legs BANG! a band saw blade breaks! Well I got three out of four cut- another one bites the dust, good time for a beer anyway- finish it tomorrow.

Cutting the leg shape


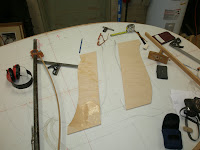
Now that the tenons are cut and I don't need my reference points, I can band saw the shape of the legs. I'll lift the shape of the legs off the drawing and create some templates, these will help me layout the leg shape for band sawing and route the final shape later.

Motice to tenon


Now I'm going to transfer the layout to the ends of the legs to align the tenons, then I'll cut the tenons on the table saw.

Laying out the mortices


I like cutting full mortice and tenon joints, here I am using a double tenon since I have the width of the leg, this will result in a pretty beefy joint.

Making the dining table base


So now its time to put the top away and begin making the table base. As we designed, the base is to have a crossing configuration of two top supports and two foot parts connected by four curved legs. I have cut the cross pieces with their lap joints and am ready to cut the mortices in them.

Tuesday, December 22, 2009

Top now ready for edge


The top is essentially done now and just needs an edge that will be soft for arms and crisp for the design detail.

Compass plane


I have an old compass plane that works very nicely to fare the curves of the table edge.

Edge work


Now that the top has been cut close to size, we can use a router and template to cut all four sections referenced off the center lines.

Cut out


Now that we have the curves laid out we can cut close to the line on the bandsaw.

Top shape


With the top flat and true, we can now lay out the top shape with a template.

Plane and flatten top


The top boards now need to be made flush and the entire top has to be made flat and smooth to the touch. A craftsman using a plane and hand can make a top as flat as any wide bed sander.

Glue top


I like to scrape the glue off the boards while wet.

Prepping glue


The boards are run on the jointer to get a prefect glue joint, then they are glued in half sections of the top so we don't have to glue every board all at once.

Milling


We joint and mill the pieces for the top so they are flat and true- the 6/4 lumber has some thickness that will result in a good thick top.

Layout and chose


I mill only the best parts of the boards to be milled and joined for the top.

Good wood


Good wood is hard to find, it took three separate trips to three yards to find a pile of 6/4 and 8/4 cherry lumber to build this table.

Next project: Oval dining table in cherry


Good designs are hard to come by, myself and a designer worked hard to hammer out the subtle shapes and concept for the table and base.