Saturday, June 25, 2011

Cribbage anyone?

On 6/23/11 3:19 PM, "client" wrote:

Just so I can pretend to know what I am talking about...what kind of wood did you use ?

Best,


----- Original Message -----
From: PhilP [phil@philipponvertdesigns.com]
Sent: 06/23/2011 04:23 PM MST


Top part with the holes is bird’s eye maple- it comes from the UP of Michigan and was a slice off the end of a board that has been in my collection for years in Michigan and made the cut to be hauled out here. The darker wood is macasar ebony- a bit rare these days and came from a friends saw mill in Tucson, that piece is likely 30 years old since cutting, stored in some guys shop, my pal bought it and then I bought it and threw it in my truck along with a pile of Mesquite lumber, hauled it up here to Sedona and stuffed it in my wood rack. All these pieces just sit and wait until I have just the right project- in fact these two pieces were so close to the right grain, contrast and size that the trimmings of wood might have filled my shirt pocket. The design of the board with magnet and storage came from several sources I found that had antique boards – and I like the fact that you can have a special set of cards and pegs for this special board. The lettering for the initials font is Optima and I like its subtle nature. When I was done making this for you guys several people came through the shop and admired it, a lot. One was a friend who is an upholsterer and she and I agreed that a finishing touch would be the bag, so she went right home and pulled some material samples and we agreed on the red with the black draw string. It has an oil finish and the ebony may be a little sticky, hence the rags, keep them around a while so you can buff it off.
So there you have it- take care- Phil


It's perfect. I just gave it to her and she cried. Never underestimate the power your work gives others.
Thanks man......
--------------------------
Sent from my BlackBerry Wireless Handheld

Saturday, June 18, 2011

Bring it on home


I don't think I've asked too much of these pieces- they seem to flow well together- fit and trim is next.

Gotta start somewhere


I've taken my time getting a feel for these pieces so now I'm just gonna cut one and get it started. I've got some focus points and some transitions, some figured grains and some color variations, I'll mix these up so there is overall balance.

Curves


These shapes are derived from the eventual shape of the table and the inherent movement of the pieces. Interlocking and contrasting neighbor pieces, I hope they get along.

Graindure


Like that word? Made it up- but it is sort of representative of the treasure hunt I got to do today, sorting and admiring grains and textures. I am piecing together the top of the table now, these mesquite boards are really lit up with colors, I'm trying to mix it up, shapes with grains, swirls with curves.

Monday, June 13, 2011

Game board blue


I'm making a cribbage board of ebony and bird's eye maple- its a cool little project and these two pieces of wood are really nice- a little string inlay, a place for the cards and pegs, some tactile shapes and away we go!

Cut out


I designed this table to have a cut out in the top section and will support a glass insert- then I'm hoping that I can align the recess in the lower top to swing under the glass and then pull out to be its own detail, I guess I am attracted to complicated designs, the trick of course is to make them seem effortless and clean, we'll see about that!

Sub top


I'm using cherry as my secondary wood here and have attached the tops to the curved side rails.

Two halves


This table has two parts that fit together and expand or collapse as needed. The parts each have a sub surface of cherry wood that will serve to attach the final top surface of Mesquite. The curved stretchers have to slide together and create the mechanism that pivots and slides.

Sunday, June 5, 2011

New post card


Here's a post card with my walnut hall table and recent kitchen project, I'll have some posts about the kitchen in the future.

Gnarly high altitude tree


This tree is growing on a mountain ridge on Mt Baldy in California, near tree line at 9500 feet, its a sugar pine, is wind whipped and twisted, and is likely very old. I just had to hug this one.

Coming together


Slowly I'm seeing the form of this piece come together- I have to set the pivot point and add a secondary wood surface before I start to get into the mesquite multi piece top- that's going to be a project in its self.

Old style hand plane is the best way

Hand planes work so well its amazing to me that they are rarely used in shops today. They carve well, make a true curve or straight and allow a connection to the material that cannot be experienced any other way.


These shavings are used for part of my finishing process, they are soft and strong, a thin slice that feels neat in your hand.
Some once entered my shop after I had been planing some wood and said- "hey it looks like fall in here, like all the leaves on the ground" perhaps like the shavings fell from a tree and landed on my bench, well they did, sort of.....

Legs

The band saw is a great free style carver.Slowly the shape takes form- these legs have slight variations in the curves and tapers- I'm using my intuition here.

Rough boards to machined parts


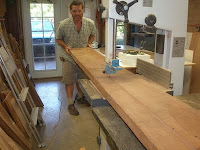
Each of these parts starts as a rough board- I've got some nice quality 8/4 mahogany I'm using for the big thick legs. Band saw them out, square em up, I've got to glue up some chunks....

Danger!

Every time I use my machines I am reminded of their inherent danger to us humans- the blades are very sharp and the machine powerful- no project is worth an accident.

Attaching the rails


I've got two halves here that will fit together in the finished design. I've got the corner joints going here and some tongue and groove system for the slide, there is some engineering on this design.

Making curved parts

Gluing laminates for the curved rails includes prepping the thickness to correspond to the anticipated spring back and the form curve- the number of laminate layers always results in the same formula for spring back- no matter the thickness. I prep the form, roll on some glue and keep the parts aligned, slip them in the form to clamp.


I slip the glue covered laminates into the form and get the clamps going- there is a balance between the side force and the down force on the form.
After a good dying time I can pop the glue up out of the form and check it out- looks pretty good- now I'll check the two parts together as thats whet they are supposed to do here- slide side by side.

Thursday, June 2, 2011

Talking to the Bro


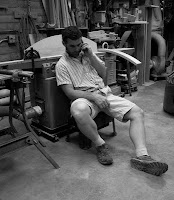
Time out in the shop to chat with my Bro in CT- my shop is my office, my hang out, my work place, my creative outlet, lets see, what else?

Curved parts


Here are the bent parts that will support the top pieces and act as the curved guide for the slide action.

Dream


If a design is created during a dream, is the concept a dream in reality? Is the reality of the design a real life element of a dream? What is the right environment that allows our brains to develope ideas? Can we re- create a dream or does it come to us on its own accord?

New project: Coffee table


Heres the new design concept- its an engineering challenge as the two parts are designed to slide open and closed- I'm using mesquite for the top and mahogany for the legs and base parts.